Logging In
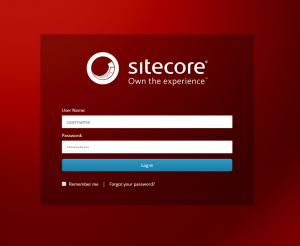
Visit https://admin.resourceumc.org/sitecore/login. Login with your username and password.
Contact an onsite Sitecore admin if you don’t have login credentials.
Launchpad
Once you login, you’ll be redirected to your Sitecore “Launchpad.”
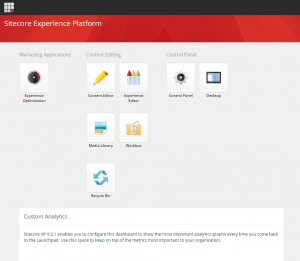
Different users will have access to different areas of the Launchpad. Here’s a quick overview of each area.
1. Experience Optimization – Marketing tools.
2. Content Editor – Create new, or edit existing, content.
3. Experience Editor – Modify display of Home, Category, Intermediate, Campaign, Agency or other “parent” pages.
4. Media Library – Upload or access photography and other assets.
5. Workbox – Work with pending approvals, edits or other workflow items.
6. Recycling Bin – This section holds inactive items pending deletion.
7. Control Panel – Edit personal password, dashboard preferences and other settings.
8. Desktop – A virtual workspace.
NOTE:
The Launchpad can always be accessed by clicking the “Launchpad” icon (Image 2) in the upper left corner of your browser window.

File Tree
Sitecore displays files, components, lists and articles through a visual management system similar to Windows or Mac file managers.
ResourceUMC.org content is specifically located in the sitecore/Content/ResourceUMC directory.
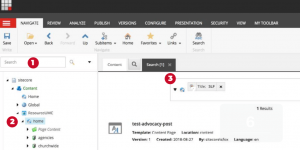
Site files are displayed in a tall, narrow frame (the File Tree) to the left of the Content Editor and Media Library sections (which can also be accessed via the Launchpad). While users can search for existing files using the search bar above the File Tree (Image 1), results can be difficult to filter.
Consult under searching to better understand optimal search practices.
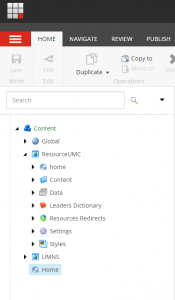
The File Tree’s primary purpose is to give users quick access to sections of the site as opposed to specific pieces of content. Articles, images, settings and other data do not display in perfect site order.
To access a specific piece of content from the File Tree, simply double-click the file. The selected file will appear in the area to the left (Image 2) of the File Tree. Click the “Content” tab to view the selected content, or click “Search” tab to search within the selected folder.
Publishing Articles, Images, and Listings
Note: These instructions are for ALL publishing tasks — articles, images, and listings.
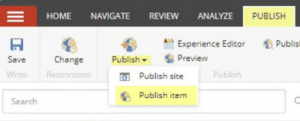
Hitting the “big Publish icon”, rather than selecting the appropriate options via Publish Item can result in unexpected behaviors (Image 1).
» To publish, click on the Publish tab, then the Publish dropdown arrow, and select “Publish Item.” (Image 1).
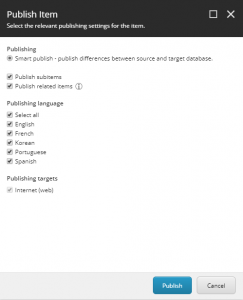
» Select all available options unless you know someone else is working on another language version of the content simultaneously. In that case, uncheck the other language being worked on (not the one you are working on).
» Click on the Publish button, and confirm any additional pop up notifications that are displayed (Image 2).
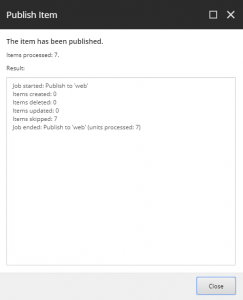
Once the publishing process has completed, you will see a pop-up similar to Image 3.
» Click Close and you’re done!
Searching
Sitecore offers several search filters and other options to make searching content simple.
1. Start your search in the File Tree. By selecting a specific section of the site, you can limit your search results to that area. Looking for a specific piece of content?
2. Select the Content / ResourceUMC / home folder.
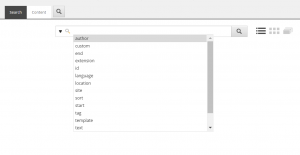
3. Next, type your search in the large search bar to the right of File Tree. Simply typing your search criteria in the bar will display content with the phrase anywhere in the content (Title, body, categories, tags, etc.)
To search by title, simply type “Title:” in the search bar and click enter. This will filter results by title. Simply type any part of the article title in the space after the filter to display results.
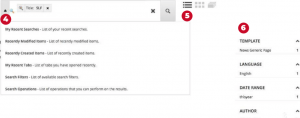
4. Recent Searches, Recently Modified, Recently Created and other useful filters can be accesed by clicking on the dropdown arrow to the left of the search bar.
5. Display search results in columns or rows.
6. Many of these filters are still in devlopment.