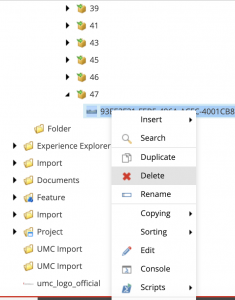
While there is a big DELETE button on the Home tab of the content editor, it does not fully delete an article. To remove an article completely from the front end, one of the parent buckets must be published as well.
First, you must locate where the article lives before deleting it. In the content editor, click on the View tab and make sure Buckets is checked.
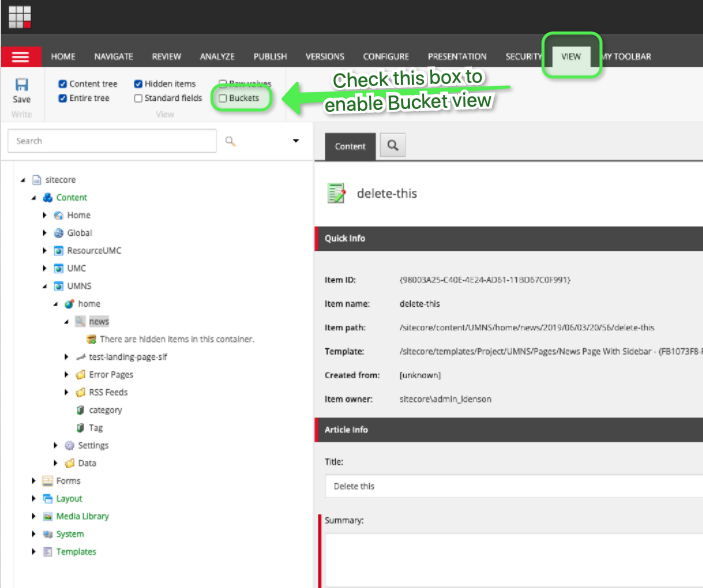
This will reveal the file structure, or “buckets” in your content folder (“news” for UMNews, “content” for ResourceUMC, “search” for UMC.org):
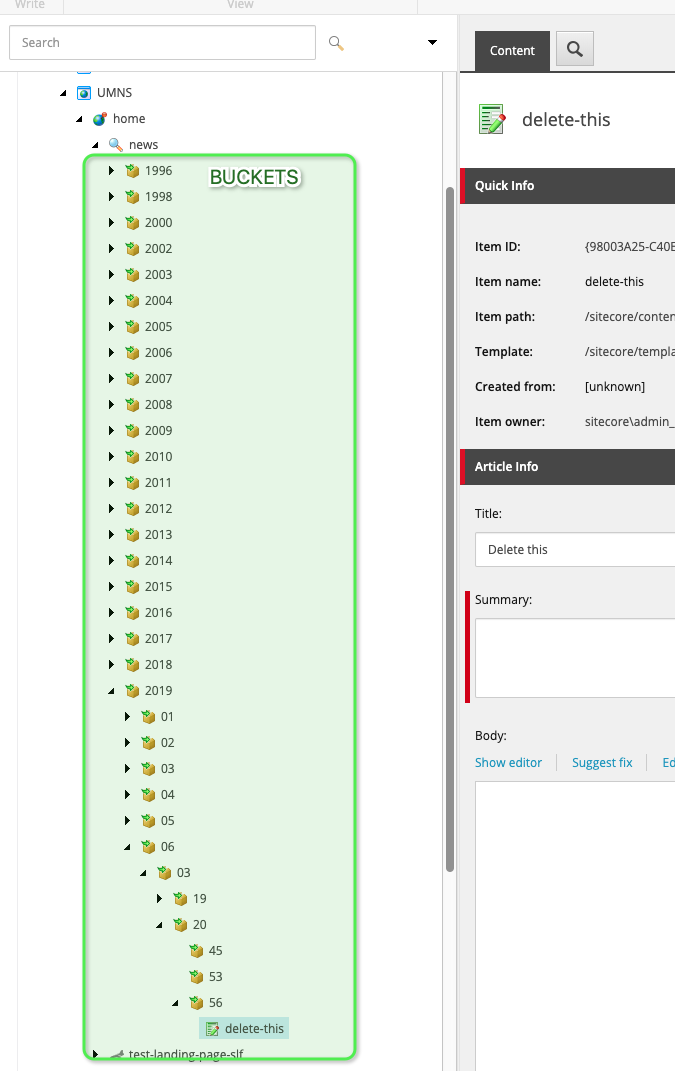
Click on the parent folder (e.g. “news”) and search to find the article you want to delete. Note which bucket is expanded in the content tree.
Open the article in the content editor, click on the Home tab, and click on Delete. (Alternately, you can right-click on the article in the content tree and select Delete from the context menu.)
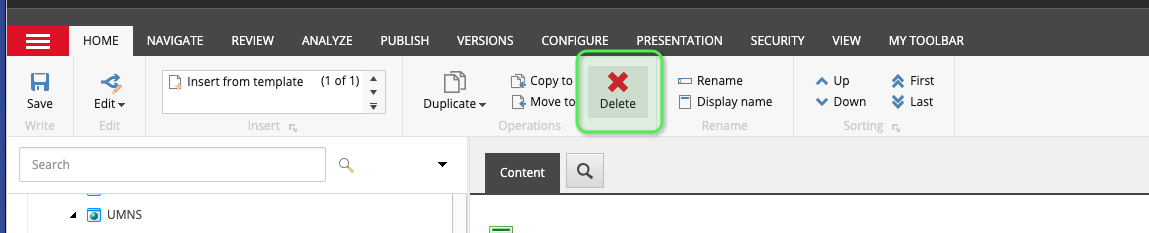
If the article is not linked elsewhere in Sitecore, this will remove the article from the backend. Proceed to Publishing the Containing Bucket below.
BREAKING LINKS
If the article *is* linked elsewhere in Sitecore, you will receive a warning:
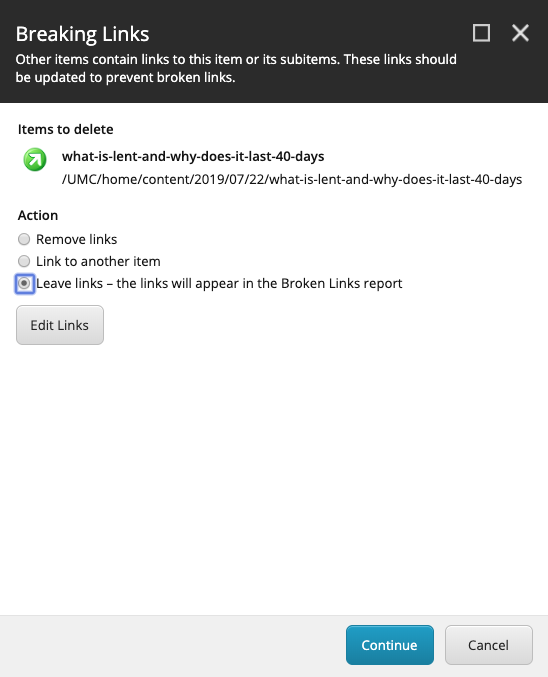
You can remove the links entirely, link to another item, or leave the broken link where it is.
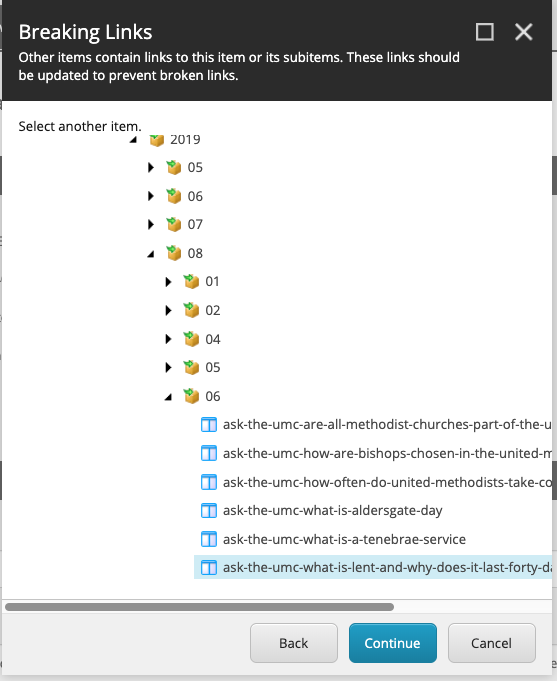
Assuming there is another, duplicate article you can link to, select Link to another item and click Continue.
In this instance we are deleting an external link, and will re-link to an article within Sitecore. Drill down to the year/month/day folder where the new article lives, select it, and click Continue
Publishing the containing bucket
To do this, click on one of the parent folders in the bucket tree – the date or hour will be sufficient – then click on the Publish tab and publish the folder as you would a standard article:
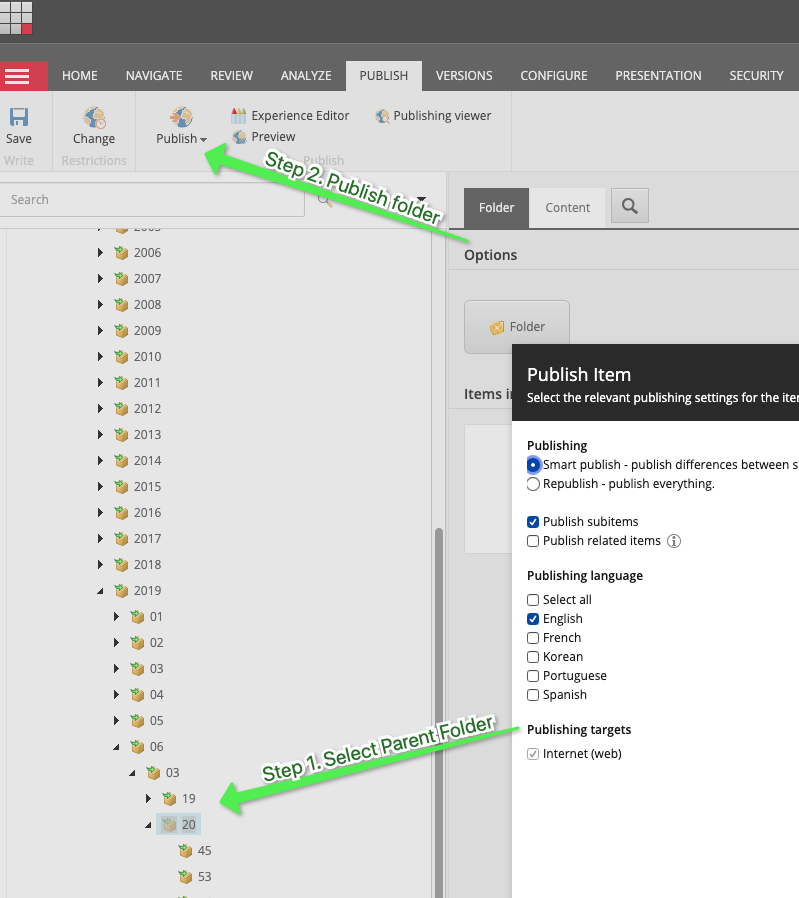
The article should no longer appear on the site.
PLEASE NOTE: Do not publish the month or year bucket. As they typically contain many articles, it can take a long time for the publish process to complete.
DELETING IMAGES IN MEDIA LIBRARY
- Search or Navigate to the image you need to delete from the Media Library. If you are searching, select the ‘Media Library’ item in the Content Tree before searching so the search can be conducted for this folder only.
- Select the image item, right click and then click ‘Delete’.