Content
Once you’ve uploaded images for your new article, either click “Content Editor” from the dashboard, or click the Content Editor tab in the lower left corner.

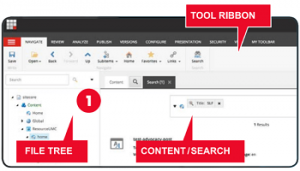
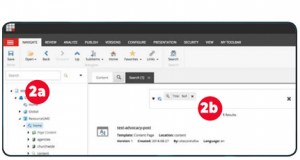
1. Site files are displayed in a tall, narrow frame (the File Tree) on the left of the Content Editor. Users can explore the contents of the site and restrict searches to selected folders (2b). Here, related articles, images and other assets will display based on functional organization. To create a new article (also called an “item” within Sitecore) expand the File Tree to: “Content / ResourceUMC / home / content”
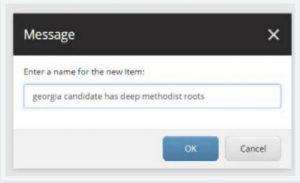
2a. Right Click on “ResourceUMC/home/content” in the File Tree and select “Insert” and choose “Content Page”. Name your content and click “OK.”
Important: Make sure to select “/content” under the “/home” folder, and not “/Content” in the “/ResourceUMC” folder.
NOTE: The name should be in all lower case, no punctuation. This is not the title that will be displayed on the page itself. HOWEVER, it should reflect the actual name of the article. No shorthand or abbreviations. This will assist in finding the story later, and is SEO best practices. If you are migrating a story from Expression Engine, the name must be identical to the url title of the EE story.
For example , if you are rebuilding: http://www.umc.org/news-and-media/storm-shuts-down-united-methodist-schools-in-sierra-leone1 You MUST name the story: storm-shuts-down-united-methodist-schools-in-sierra-leone1
NOTE – URL title: This is the name given to the article in the previous step. To rename it, click on it and give it a new URL. Do not change the URL once a story has been published if at all possible. This will break any external links to the article. Internal links should be adjusted automatically.
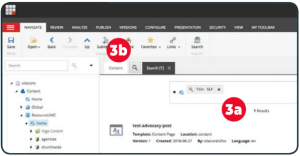
3b. Click the Content tababove the “Content / Search” area on the right side of this page. The various editable fields will appear. Make changes as necessary.
NOTE: Before a new article is published, a few “workflow“ steps must be followed:
1. Click “SAVE” in the upper left corner of the “Ribbon.”
2. Under “REVIEW” tab…
- Check-in – Places a new, saved file into “version control” repository.
- Important Submit – Prompts publisher to approve and publish
NOTE: Step 2 is only necessary for previously unpublished content.
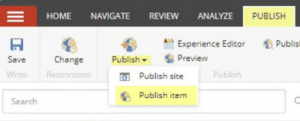
3. Return to “PUBLISH” and choose “Publish Item” from the Publish dropdown options.
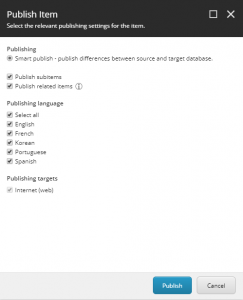
Ensure all options and languages are selected, and confirm your publish (Image 2).
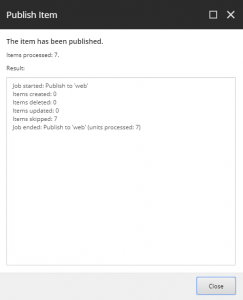
4. Once the publishing process has completed, you will see a pop-up similar to Image 3; your content has been published.